NSA Codebreaker 2025 T1
A walkthrough of the NSA Codebreaker 2025 T1 challenge detailing the forensic analysis of a Linux EXT2 image to uncover a hidden malicious artifact and extract its SHA-1 hash.

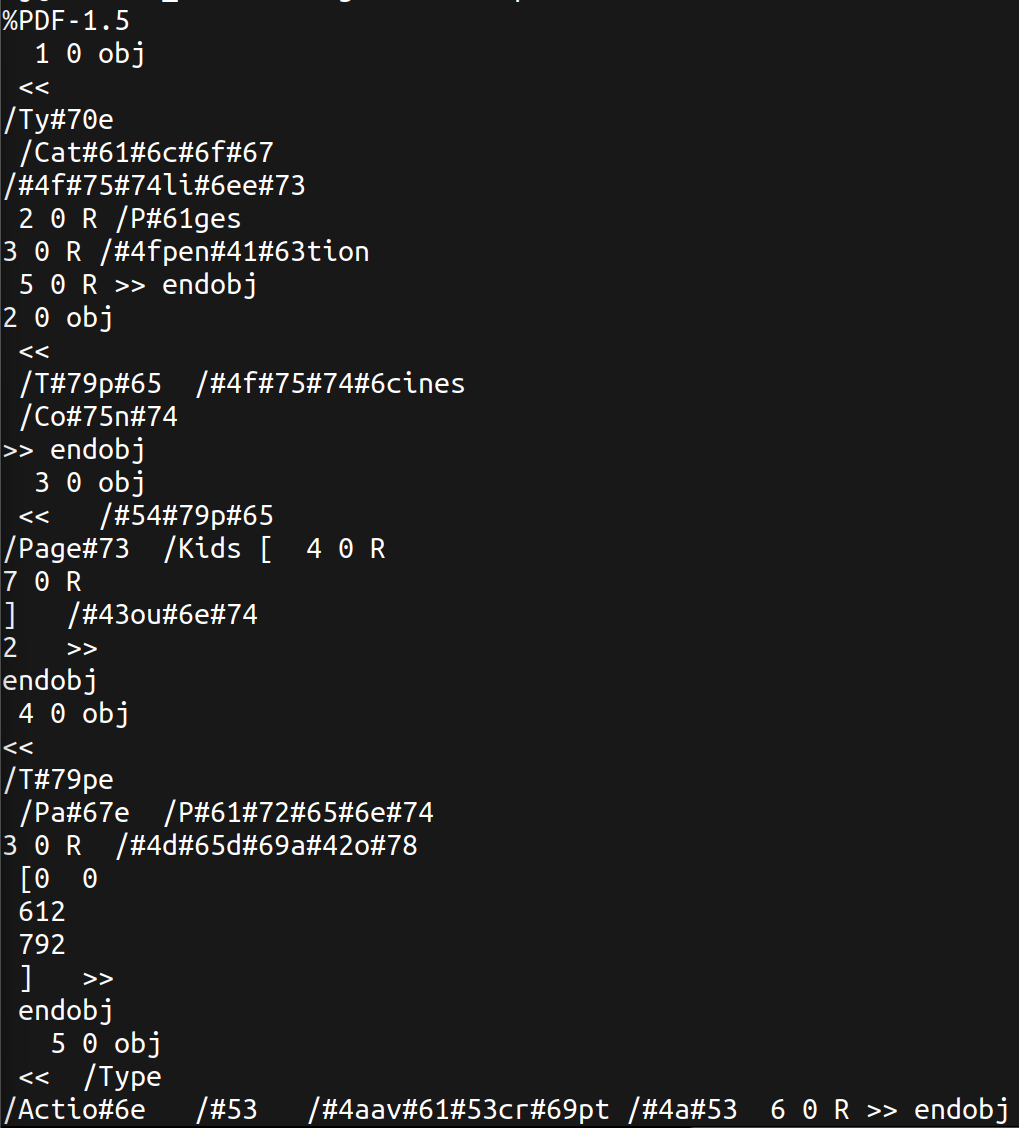
Upon extracting the archive, we are presented with a file named APT9001.pdf, identified as a PDF document, version 1.5.
Running the strings command on the file reveals some obfuscated strings related to possible scripting. One particularly interesting string is /Fla#74eDe#63o#64#65 /AS#43IIHexD#65cod#65 ], which decodes to /FlateDecode /ASCIIHexDecode.
To analyze any embedded scripts, we can use a tool called Origami
sudo apt install origami-pdf
First, let’s use pdfcop:
Runs some heuristic checks to detect dangerous contents.
Origami - pdfcop
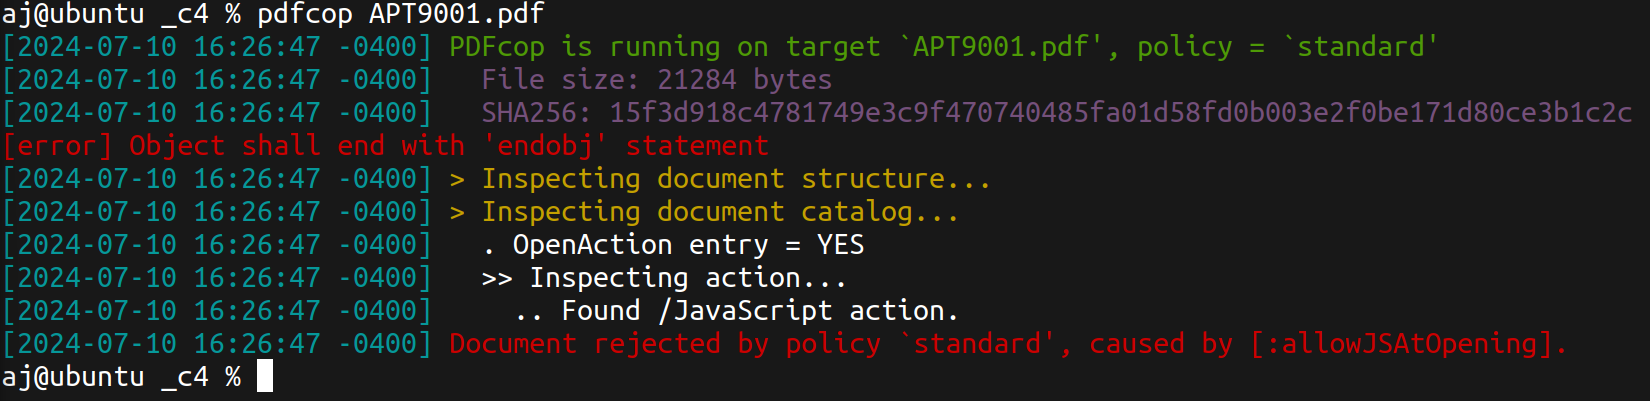
As shown in the screenshot, a /Javascript action was found. Next, let’s use the pdfextract tool, also part of Origami.
Runs some heuristic checks to detect dangerous contents.
Origami - pdfextract

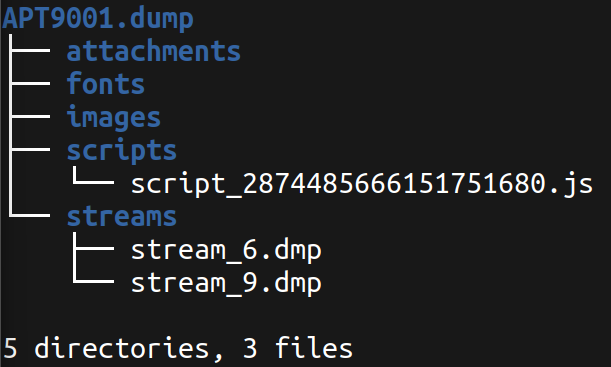
Great, we have extracted a script file. Let’s open it in the best text editor Sublime 😉
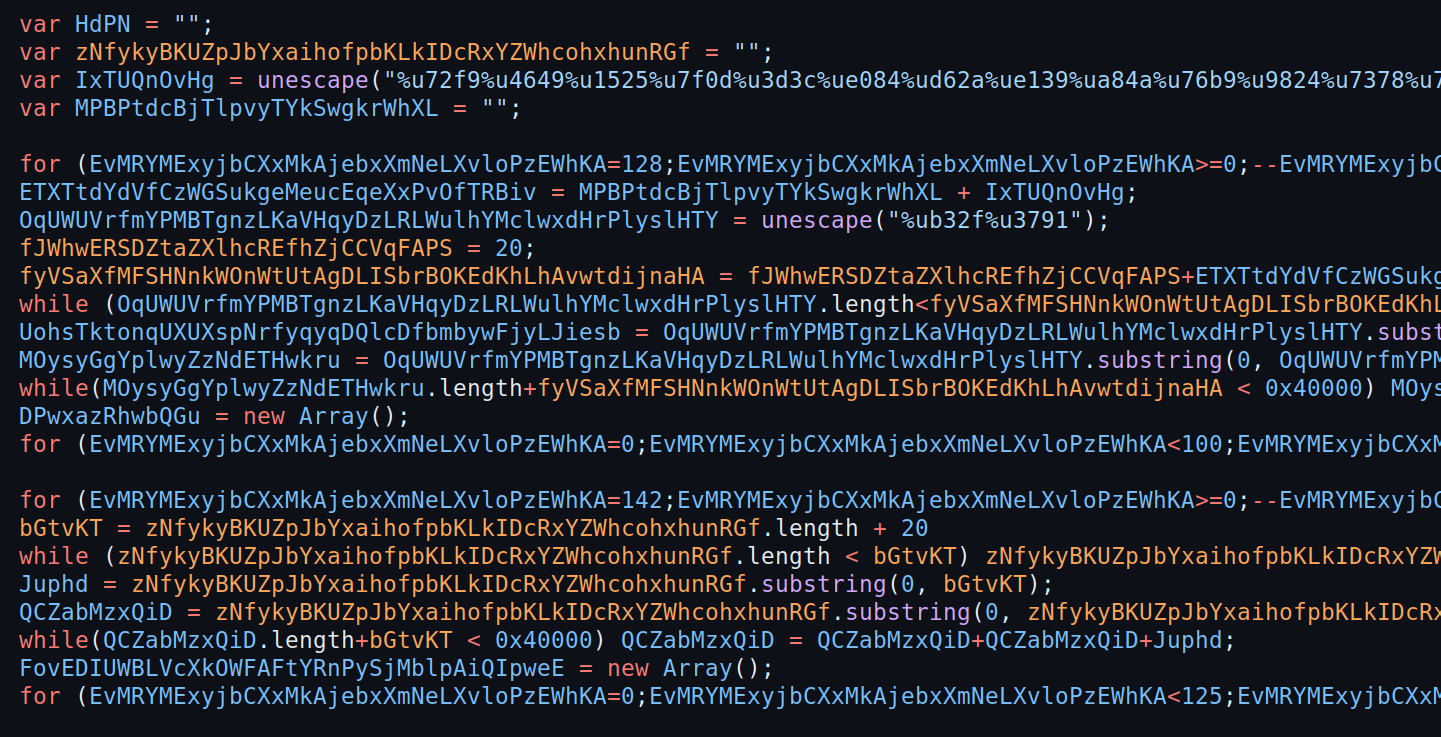
It appears to be an obfuscated JavaScript file with excessively long variable names. Let’s rename them for clarity.
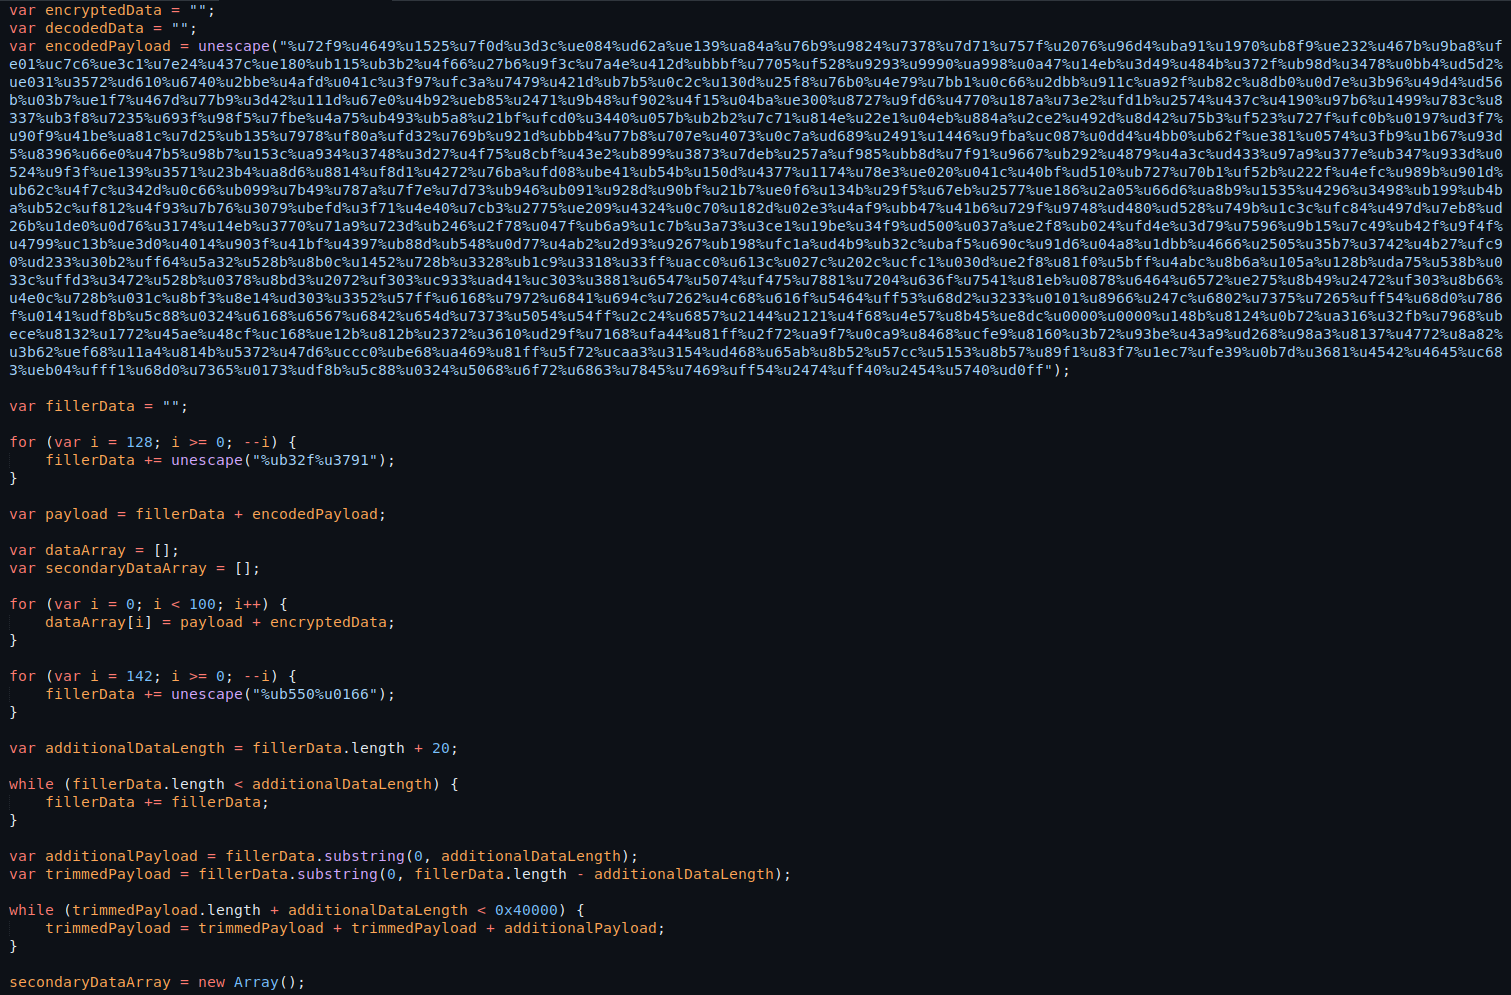
Much better! In a previous blog post, Unraveling the Mysteries of Malware in the Wild I encountered a similar malware sample in a PDF. From that experience, I know the encodedPayload is likely the key focus, containing the escaped data. We’ll use the following JavaScript snippet to write out the unescaped raw binary data to a file:
const fs = require('fs');

// Convert unescaped string to binary
function unicodeToBinary(unicodeString) {
    const binaryArray = [];
    for (let i = 0; i < unicodeString.length; i++) {
        const charCode = unicodeString.charCodeAt(i);
        binaryArray.push(charCode & 0xFF); // Low byte
        binaryArray.push(charCode >> 8);   // High byte
    }
    return new Uint8Array(binaryArray);
}

// Combine the secondaryDataArray into one string
let combinedData = '';
for (let i = 0; i < encodedPayload.length; i++) {
    combinedData += encodedPayload[i];
}

// Convert combined data to binary
const binaryPayload = unicodeToBinary(combinedData);

// Write binary data to file
fs.writeFileSync('encodedPayload.bin', Buffer.from(binaryPayload));

console.log('Binary data written to encodedPayload.bin');
After appending this code to the file, we run it to extract the “decoded” payload into encodedPayload.bin.
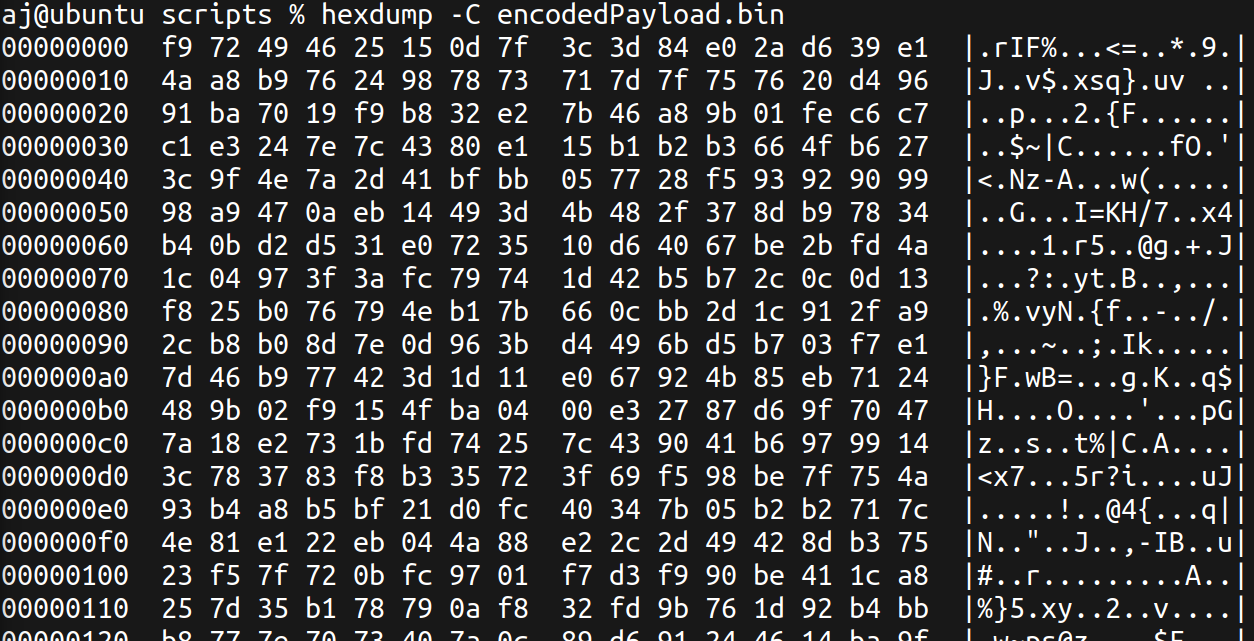
Now that we have the raw bytes of the payload, we need to determine its nature. My initial thought is that it could be shellcode. Let’s use ndisasm to see if it disassembles into any recognizable opcodes.
ndisasm -b 32 -p intel encodedPayload.bin
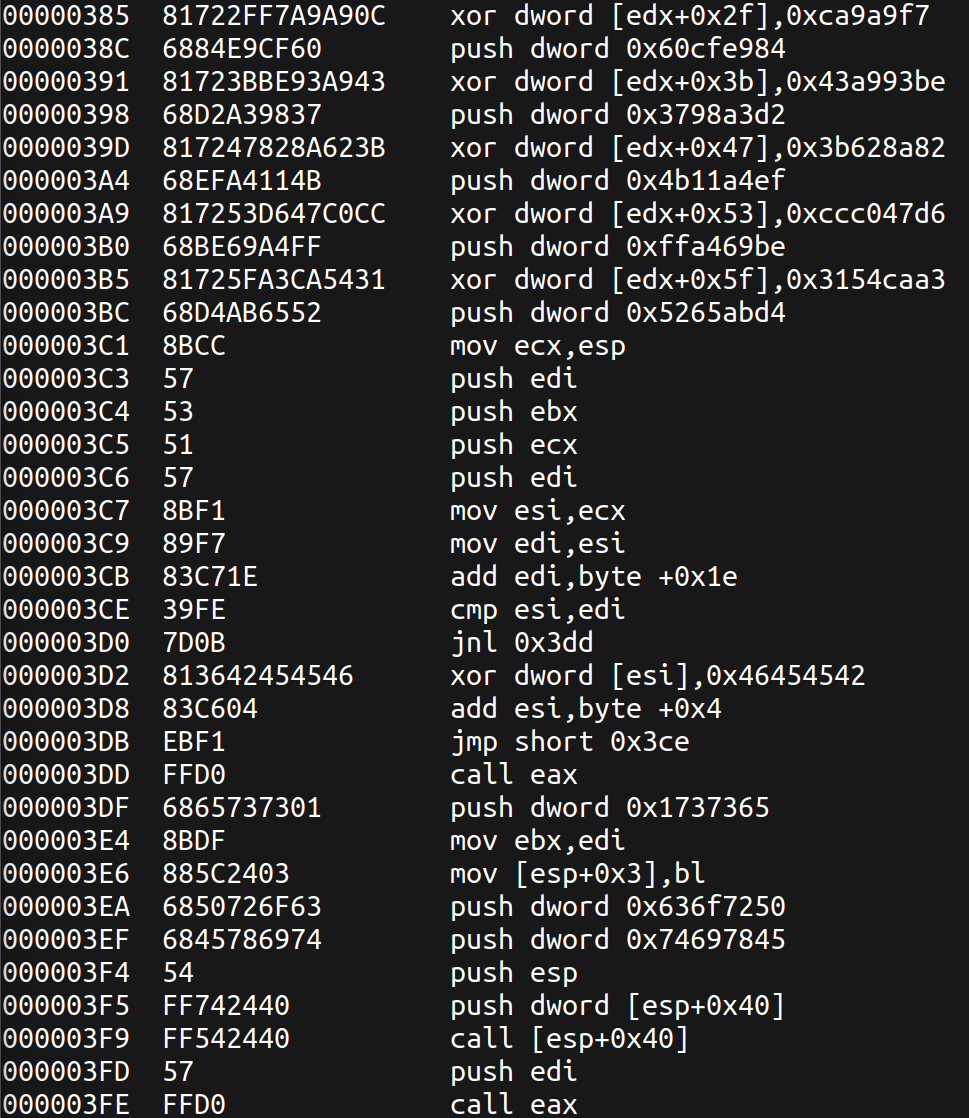
The results are lengthy, but it’s clear this contains Intel opcodes and a section using XOR decryption.
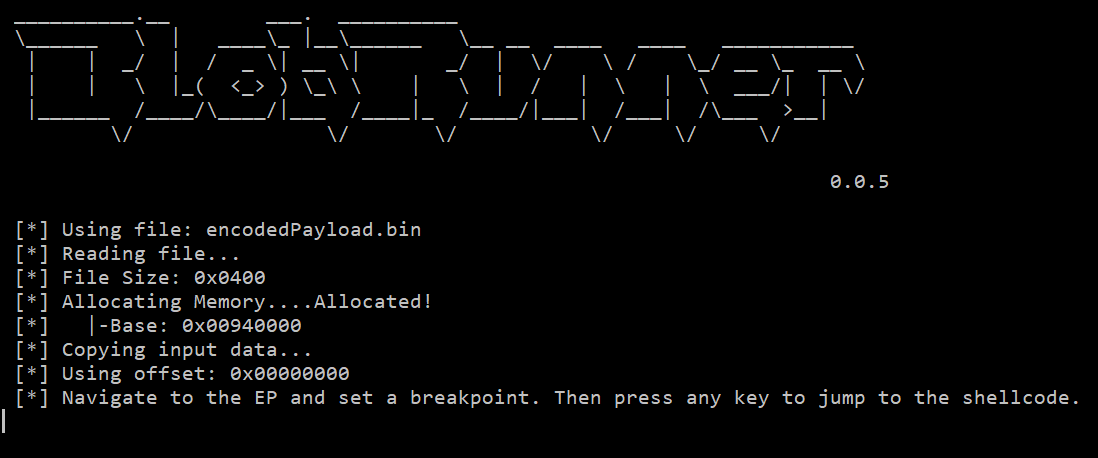
To execute this shellcode, we can create a harness program. After several unsuccessful attempts creating my own harness programs related towards memory errors, I found another approach using BlobRunner.
BlobRunner is a simple tool to quickly debug shellcode extracted during malware analysis.
BlobRunner
.\blobrunner.exe encodedPayload.bin
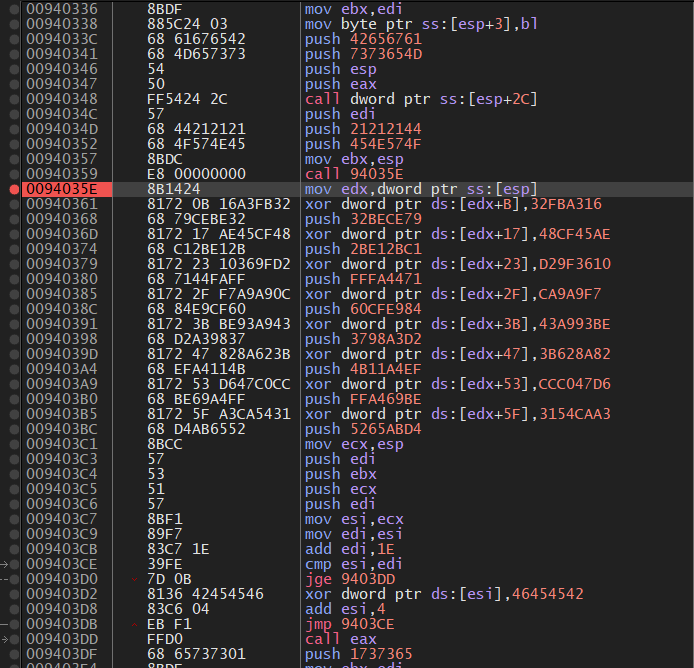
With the program running, we can attach to the blobrunner process using x32dbg or IDA.
Next, we’ll set a breakpoint at the “XOR decryption” section.
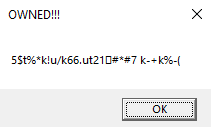
Continuing the program execution reveals a MessageBox.
We observe the data being XOR decrypted twice before being displayed.
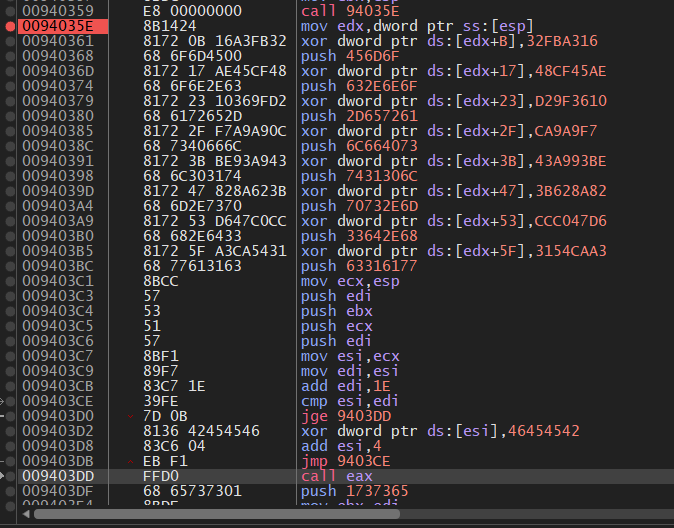
Single-stepping through the decryption process shows the data before its final XOR operation.
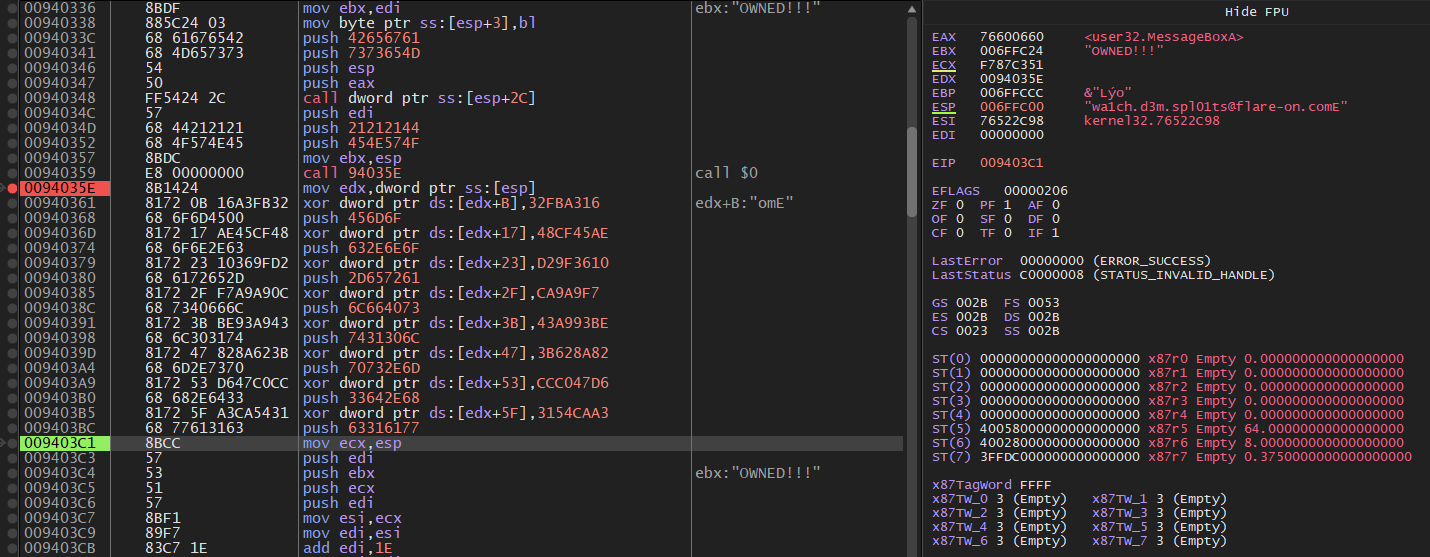
Flag: wa1ch.d3m.spl01ts@flare-on.com
A walkthrough of the NSA Codebreaker 2025 T1 challenge detailing the forensic analysis of a Linux EXT2 image to uncover a hidden malicious artifact and extract its SHA-1 hash.
In this write-up for the picoCTF challenge "Investigating Reversing 0," we tackle the transformation of flag data in mystery.png. By analyzing how the program modifies the data and applying the reverse logic, we’ll decode the hidden flag.
In this write-up for the picoCTF challenge "WebNet1", we decrypt TLS traffic using a provided private key. Follow along as we use Wireshark to extract decrypted HTTP files and uncover the flag through analysis.

